Flood Protection for Texas Homeowners
Door Flood Shields:
DIY or Call a Pro?
When floodwater reaches your doorstep, the right door flood shield can mean the difference between a dry home and a devastating repair bill. Here’s how to choose, install, and maintain door flood shields for Texas conditions.
Door flood shields — also called flood barriers, flood panels, or door flood guards — are physical barriers designed to seal door openings against rising water. Unlike sandbags, which are temporary and messy, modern door flood shields provide reusable, effective protection that can be deployed quickly when a storm is approaching and stored compactly when not in use.
In Texas, where flash flooding can strike with little warning — from Houston’s notoriously flat drainage to the Hill Country’s rapid-rise creeks — having the right door protection in place before a storm arrives is one of the most practical investments a homeowner can make. Many installations are well within DIY reach. Others, particularly permanent or structural systems, benefit significantly from professional fitting.
Types of Door Flood Shields
Understanding the right product for your situation is the first decision to get right. The four main categories vary significantly in cost, protection level, and installation complexity:
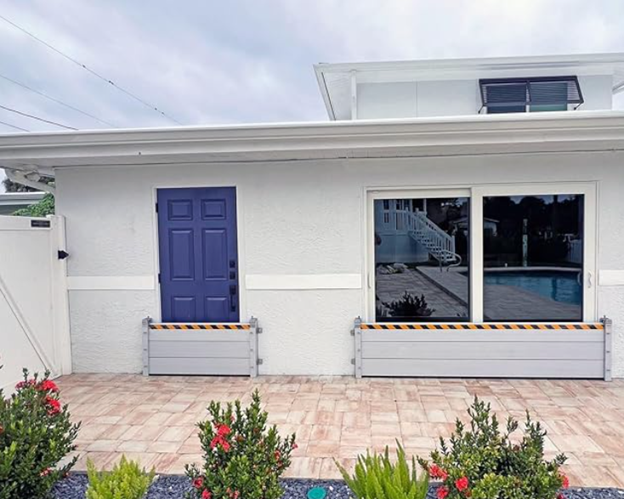
Removable Flood Barriers
Aluminum or composite panels that slot into pre-installed door frame channels. Deployed when needed, stored when not. Effective to 24–36 inches of water depth.
DIY or Pro InstallView on Amazon →
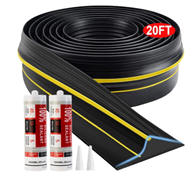
Door Frame Flood Seals
Rubber or neoprene seals fitted to the door frame and threshold to block seepage at the gap between door and frame. Lower-cost entry-level protection for minor flooding.
DIY FriendlyView on Amazon →

Self-Closing Flood Doors
Engineered door replacements with integrated sealing systems. Activate automatically via floats or manual triggers. Highest protection level — typically rated to 3–5 feet of water.
Professional Install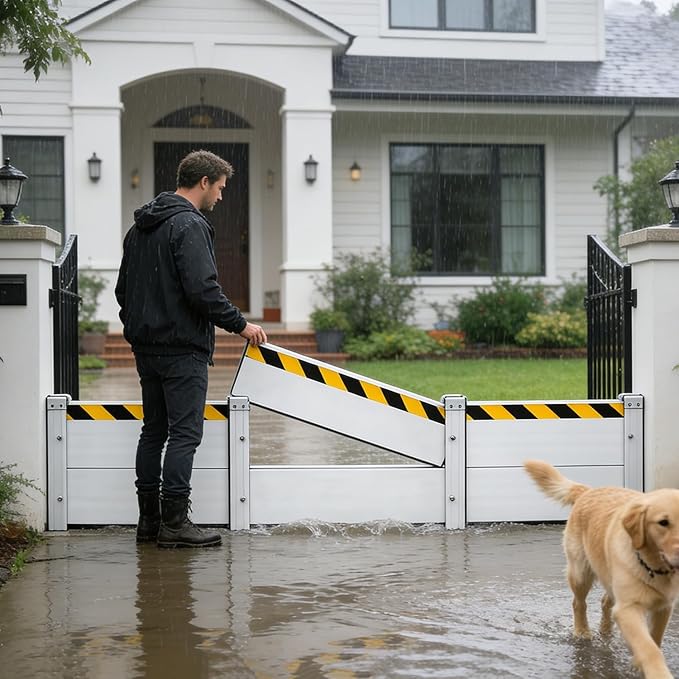
Stackable Flood Panels
Individual boards or panels stacked in door frame slots to build up protection height as needed. Flexible height adjustment for variable flood depths. Good middle-ground option.
DIY or Pro InstallView on Amazon →
DIY or Professional? Know Your Situation
✅ Good DIY Candidates
- Installing door frame seals or threshold flood strips on a standard-size door
- Fitting a removable flood panel kit to a single entry door with a flat, even threshold
- Deploying stackable flood boards in pre-installed channel systems
- Applying weatherstripping upgrades to reduce water seepage under doors
- Installing door bottom sweeps rated for flood resistance
- Setting up freestanding water-filled tube barriers for garage doors
🚫 Call a Professional
- Installing permanent channel systems into door frames or masonry thresholds
- Fitting flood protection to irregular, warped, or non-standard door frames
- Protecting multiple entry points as part of a whole-home flood barrier system
- Installing self-closing or automatic flood door systems
- Any installation requiring penetration into a concrete slab or brick threshold
- Commercial or high-value properties where flood certification is required
⚠️ Texas Flash Flooding Moves Fast
Texas leads the nation in flood fatalities, and a large proportion of flood damage occurs during flash flood events that give homeowners less than an hour of warning. This makes pre-installed, quick-deploy systems far more valuable than barriers that require lengthy setup. When evaluating flood shield options, always factor in deployment time — a system that takes 20 minutes to assemble may be useless in a fast-rising event. The best protection is already in place or can be deployed in under five minutes.
How to Install Door Flood Shields: DIY Step-by-Step Guide
Removable flood panel systems with pre-installed frame channels are the most practical DIY-friendly option for substantial flood protection. Here is a reliable installation process for standard residential doors:
Before You Begin
- Measure your door opening precisely: width at top, middle, and bottom (openings are rarely perfectly square), and threshold height from floor to the bottom of the door stop.
- Inspect your threshold condition — cracks, uneven surfaces, or worn weatherstripping will compromise the seal and need to be addressed first.
- Confirm your door frame material: wood frames accept channel fasteners easily; masonry, brick, or concrete surrounds require masonry anchors and a hammer drill.
- Check your flood risk level — FEMA flood maps and the Texas Water Development Board’s flood viewer can help you understand your expected flood depth, which determines the barrier height you need.
Tools & Materials
🛠 What You’ll Need
Tools: Tape measure, pencil, drill (plus masonry bits if applicable), level, screwdriver, silicone caulk gun, utility knife.
Materials: Flood barrier panel kit (sized to your door opening), frame channel mounting hardware, silicone sealant, masonry anchors if required, replacement threshold weatherstripping if existing seal is worn.
Estimated Cost: $150–$600 for a quality removable barrier system for a standard 36-inch door. Heavy-duty systems rated for greater water depth range from $400–$1,200. Professional-grade permanent systems start around $2,000 installed.
Installation Steps
- Prepare the door frame Clean the door frame and threshold thoroughly — remove old caulk, dirt, and debris. Any surface irregularity will create a leak path. If the threshold has cracks or gaps, fill with waterproof sealant and allow to cure fully before proceeding.
- Mark the channel positions Hold the side channels against the door frame at the correct inset position (per your kit instructions — typically flush with the interior face of the door stop). Use a level to ensure they are perfectly vertical, then mark the mounting hole locations with a pencil.
- Drill mounting holes For wood frames, drill pilot holes at marked positions. For masonry or brick surrounds, use a hammer drill with masonry bits and insert appropriate anchors. Keep holes clean and centered.
- Apply sealant behind channels Before fastening, run a bead of waterproof silicone sealant along the back face of each channel. This seals the channel-to-frame joint and prevents water from migrating behind the installed hardware.
- Fasten the side channels Press channels firmly against the frame and secure with provided fasteners. Work from top to bottom, checking level as you go. Do not overtighten — channels should sit flat and flush with no bowing or gaps.
- Install the threshold seal Fit the bottom threshold seal or rubber gasket across the door opening base per kit instructions. This is the most critical seal point — water pressure at ground level is highest here. Ensure it compresses evenly against a flat, clean surface.
- Perform a dry fit of the panel Slide or slot the flood panel into the installed channels without water present. Check that it seats fully, sits level, and compresses the threshold seal evenly along its full width. Note any gaps or high spots.
- Test with a water simulation Use a garden hose to run water against the installed barrier at the base and side seals for 5–10 minutes. Check for any seepage at corners, along the threshold, or behind the channels. Address any leaks before relying on the system in a real event.
- Store the panel accessibly The barrier panel should be stored immediately adjacent to the door it protects — not in a distant garage or storage unit. In a flash flood event, you may have minutes to deploy it. Label it clearly and ensure every household member knows its location and how to install it.
Don’t Forget the Garage Door
For many Texas homes, the garage door is the largest and most vulnerable flood opening — and it’s frequently overlooked when homeowners plan flood protection. Standard garage doors offer virtually no flood resistance. Unlike purpose-built door flood shields, garage doors lack sealing systems entirely. Options include:
- Garage door flood barriers — Freestanding inflatable or water-filled tube systems that sit against the exterior face of a closed garage door. DIY-deployable, stored compactly, effective for moderate flood depths.
- Garage door threshold seals — Rubber strips adhered to the garage floor at the base of the door. Effective for minor water intrusion and seepage; not rated for significant flood depth.
- Flood-rated garage door replacement — Structural door replacements engineered to withstand hydrostatic pressure. Professional installation required; recommended for homes in high flood-risk zones or FEMA Special Flood Hazard Areas.
When You Should Strongly Consider a Professional
- Permanent channel installation in masonry — Drilling into a concrete slab threshold or brick surround incorrectly can damage the structural seal of your home’s exterior and create new water infiltration paths.
- Whole-home flood barrier systems — Protecting every entry point (front door, back door, garage, patio doors, basement stairwells) requires coordinated sizing and deployment planning that benefits from professional assessment.
- Non-standard or historic door frames — Arched openings, oversized commercial-style doors, or historic frames with irregular dimensions require custom-fabricated systems and professional fitting.
- Automatic or self-closing flood doors — These systems involve mechanical or hydraulic components that must be precisely calibrated and integrated with the door frame structure. Improper installation voids product warranties and may fail at the critical moment.
- FEMA flood insurance compliance — Some Texas homeowners in designated flood zones use certified flood barriers as part of their insurance mitigation documentation. These installations must meet specific standards and may require a licensed contractor sign-off.
- Post-flood frame damage — If your door frame has been previously exposed to floodwater, it may have swelling, rot, or structural compromise that needs repair before a new barrier system can seal effectively.
⚠️ Why Professional Work Pays Off in Texas
A door flood shield installed with even a small misalignment can fail completely under the hydrostatic pressure of rising floodwater — rendering an expensive system useless at the worst possible moment. Professional installers bring precision measuring tools, experience with Texas’s varied home construction styles (slab-on-grade, pier-and-beam, masonry veneer), and knowledge of which systems are rated for the flood depths common in your specific area. For homes in FEMA-designated flood zones across Houston, Beaumont, the Rio Grande Valley, or Central Texas flood corridors, the cost of professional installation is a fraction of the average Texas flood claim, which routinely exceeds $30,000.
💡 A Note for Texas Homeowners
Texas has more residents living in flood-prone areas than any other state, and the state’s geography creates flood threats from multiple directions — Gulf Coast storm surge, Hill Country flash floods, and urban stormwater flooding in DFW and Houston. Door flood shields are most effective as part of a layered flood protection strategy: good yard grading and drainage keeps water away from the house; flood shields stop what reaches the door. If you’re in or near a FEMA Special Flood Hazard Area, check whether your municipality participates in FEMA’s Community Rating System — many Texas cities offer flood insurance discounts to homeowners who document flood mitigation measures including door barriers. A small amount of documentation can translate to meaningful premium savings year after year.
Quick Decision Reference: Door Flood Shields
| Situation | DIY Appropriate? |
|---|---|
| Installing threshold seals or door bottom flood sweeps | ✅ Yes |
| Fitting a removable panel kit to a standard wood-frame door | ✅ Yes |
| Deploying freestanding barriers at garage or patio doors | ✅ Yes |
| Installing channels into masonry, brick, or concrete threshold | ❌ Call a pro |
| Non-standard, arched, or oversized door openings | ❌ Call a pro |
| Automatic or self-closing flood door systems | ❌ Call a pro |
| Whole-home multi-entry flood barrier coordination | ❌ Call a pro |
| FEMA flood zone compliance or insurance documentation | ❌ Call a pro |
Not Sure Which System Is Right for Your Home?
We can help you assess your flood risk and match you with the right door flood shield — whether that’s a DIY barrier kit or a professional installation that gives you certified peace of mind.
Get a Free Assessment →